
Noise Calculation
Configure noise point, its circumstances, map, and turbine before noise calculation.
-
Click the Model Settings button in the settings area to
open the corresponding window.
Figure: Noise Settings Window 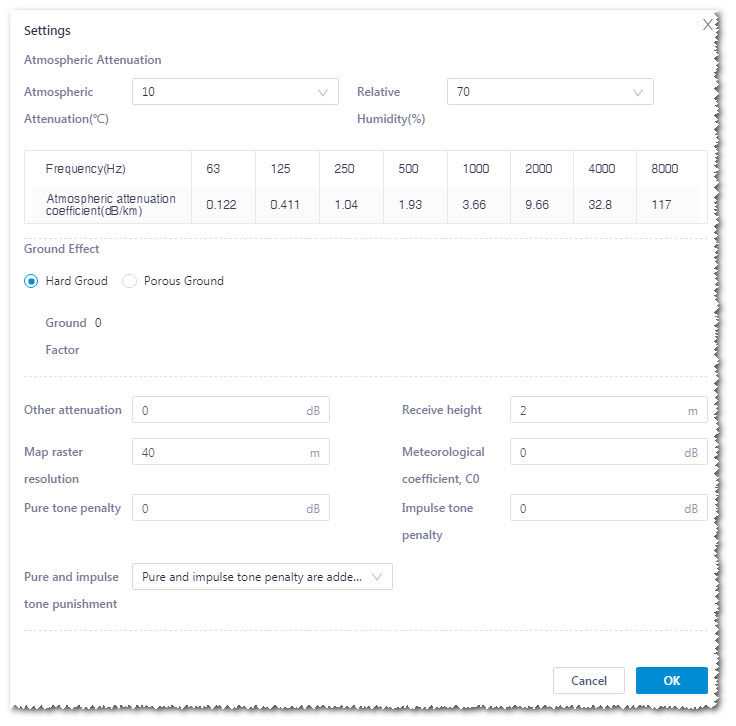
Table 1. Controls and Areas in Noise Settings Window Area Option Description Atmospheric attenuation Atmospheric temperature Input atmospheric temperature at noise point. Relative humidity Input relative humidity at noise point. Frequency Noise frequency Atmospheric attenuation coefficient The coefficient of each frequency in this field is displayed automatically according to the atmospheric temperature and relative humidity you input. Ground effect Hard ground This is the default option. The ground factor is 0 and not editable. Porous ground This is an advanced option. Set up the ground factor around turbine and receiver or between them. Other settings Other attenuation Other items that might cause attenuation. Receiver height above ground The default value is 2m. Grid resolution. Set up grid density for noise calculation. Meteorological coefficient C0 Meteorological coefficient C0 Pure tone penalty Pure tone penalty Impulse tone penalty Impulse tone penalty Pure and impulse tone punishment Pure tones penalty is added to total noise impact at receptors; Pure and impulse tone penalty are added to WTG source noise. -
Click the expand icon
 in the Map area.
-
Click the expand icon in the Receiver and
Thresholds area. All the noise points in the project are
listed.
-
Click the Threshold setting button at the right side of noise point. The settings window opens.
Figure: Noise Point Threshold Setup 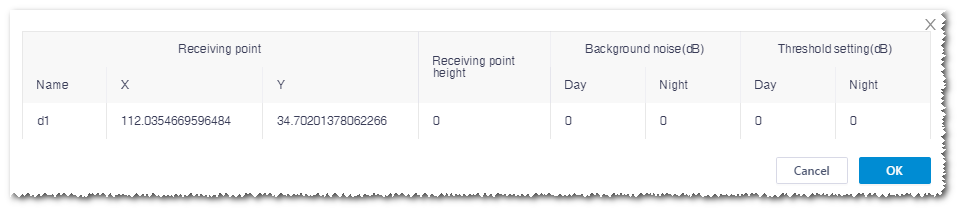
-
Click the expand icon in the Turbine Configuration area.
-
Click the expand icon in the computational boundary.
All the boundary objects in the project, including polygons and regions, are listed in the menu.
-
When the task progress reaches 100%, click the project name in the project
pane, and click the refresh button
 in the operation button area. The newly generated
noise object appears in the project pane, named
NoiseMap1.
To check the calculation results, refer to the section Checking Calculation Results.
in the operation button area. The newly generated
noise object appears in the project pane, named
NoiseMap1.
To check the calculation results, refer to the section Checking Calculation Results.