
Configuring Resource Evaluation Parameters
Resource evaluation consists of three categories: wind resource evaluation, solar resource evaluation, and wind & solar resource evaluation. You need to configure wind resource parameters, solar resource parameters, or both for each of them respectively. In addition, economic parameters are mandatory. This section only covers the details of wind & solar resource evaluation configuration, including wind resource parameters, solar resource parameters, and economic parameters. If you are doing wind resource evaluation or solar resource evaluation, refer to the corresponding steps for details.
- Click the wind farm boundary object in the project pane.
- Click the expand icon 《 to open the operation pane.
- Click the Operation tab.
- Click the Resource tab.
-
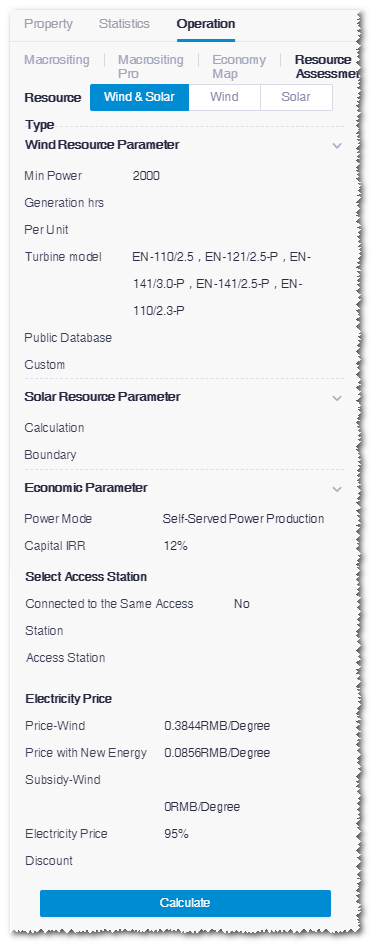
Select resource type as Wind&Solar.
-
Configure wind resource parameters.
- Input the value of minimum power generation hours per WTG.
- Select avoid areas in the Public Database list from the Greenwich public database. The database consists of building, height district area, river system, etc.
- Select areas in the Custom list. The options in the list are polygons in the project that are saved as protection areas, farmland, existing wind farms, etc. Refer to the section Drawing a Polygon for more information.
-
Configure solar resource parameters.
- Select roof object(s) in the Calculation Boundary drop-down list. The roof area objects within the current area are displayed in the drop-down list, that is, the small area objects within the current area. For details of drawing an area, refer to Drawing a Polygon.
-
Configure roof parameters.
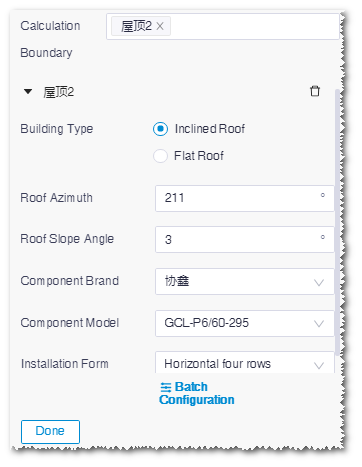
The default values of roof parameters are provided automatically by the system, among which the values of roof azimuth and roof slope angle are identified automatically according to the location of the roof object.Note: Click Batch Configuration to select multiple roof objects to set them up in group.
-
Configure economic evaluation parameters.
-
Select the power mode as Self-served Power
Production or Full Internet
Access.
Note: In this part, only the parameter setup of Self-served Power Production is introduced. If you select Full Internet Access, only perform Step b and d.
- Set up Capital internal rate of return. The default value is offered by the system and is editable.
-
Associate substation.
Before this step, create access station object and configure its
access point, voltage, power consumer, power price, and load data. Refer
to the section Configuring Grid-Connected Substations for details.
In common conditions, select NO for wind and solar
access the same station and associate more than one
substation for wind and solar power access respectively.
If you select YES for wind and solar access the same
station, you need to select wind or solar power, and
associate substation object(s).Note: If you are doing independent wind resource evaluation or solar resource evaluation, no wind and solar access the same station option is available.
- Configure electricity price. The default electricity price values are provided according to the location of current area. You can edit them according to the project conditions.
-
Select the power mode as Self-served Power
Production or Full Internet
Access.
- Click Calculate to submit the task. To check the evaluation result, refer to the section Checking Resource Evaluation Results.