Drawing a Polygon
Polygon drawing is widely used for wind farm boundary and avoiding scope definition. Open the drawing toolbar menu before drawing.
-
Double-click to finish drawing. The double-clicked point is taken as the end
point of polygon.
The starting point and end point are linked automatically. The polygon is drawn successfully.Click the polygon to show its area.
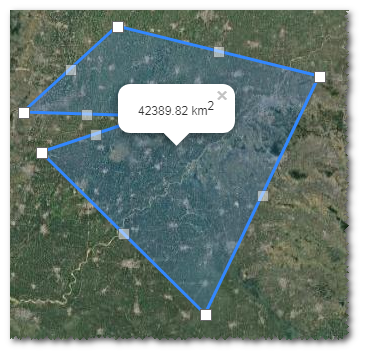
The points clicked is displayed as control nodes in GIS. Transparent
control nodes are added between every two control nodes. These control nodes are
used for changing the location and shape of polygon.
in GIS. Transparent
control nodes are added between every two control nodes. These control nodes are
used for changing the location and shape of polygon. -
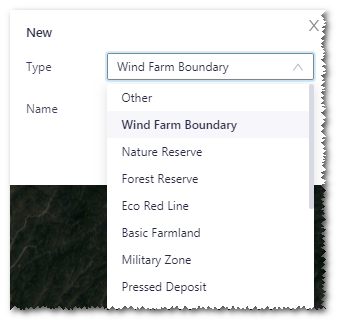
Click the Save icon to open the
New window.
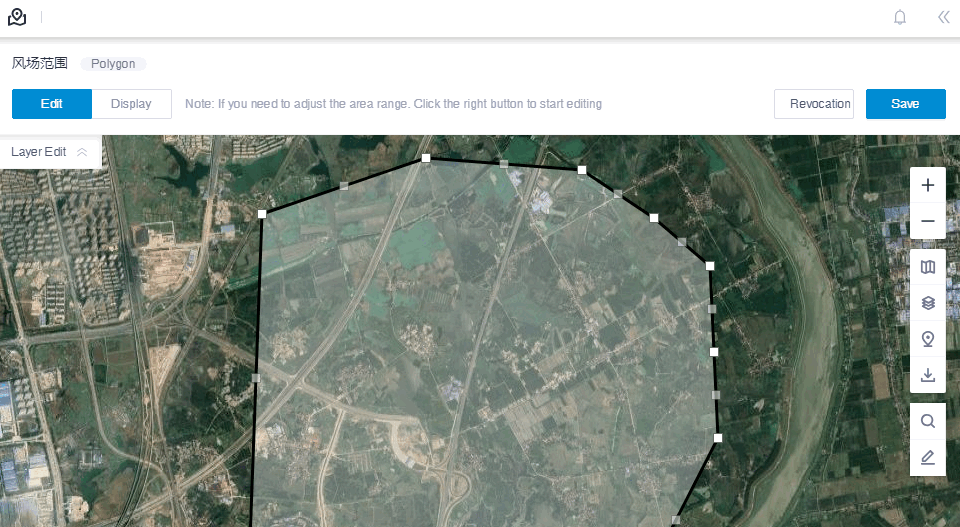
Modifying an Existing Polygon
-
Click the Edit button.
The polygon boundary becomes editable.