
Editing and Drawing the Route
After the route design, the shapes of routes are editable. If you edit their shapes, re-do the quantity optimization in the Optimize profile and cross-sectional mode as shown in the section Optimizing Route Engineering Quantity.
- Check a route design object under the route scheme, or click the route design in GIS after you check the route scheme in the Project pane. The corresponding route is displayed in GIS.
- Expand the Layer Edit panel at the left top of GIS.
-
For route scheme after quantity optimization, check Smooth
Curve and Roadside Line.
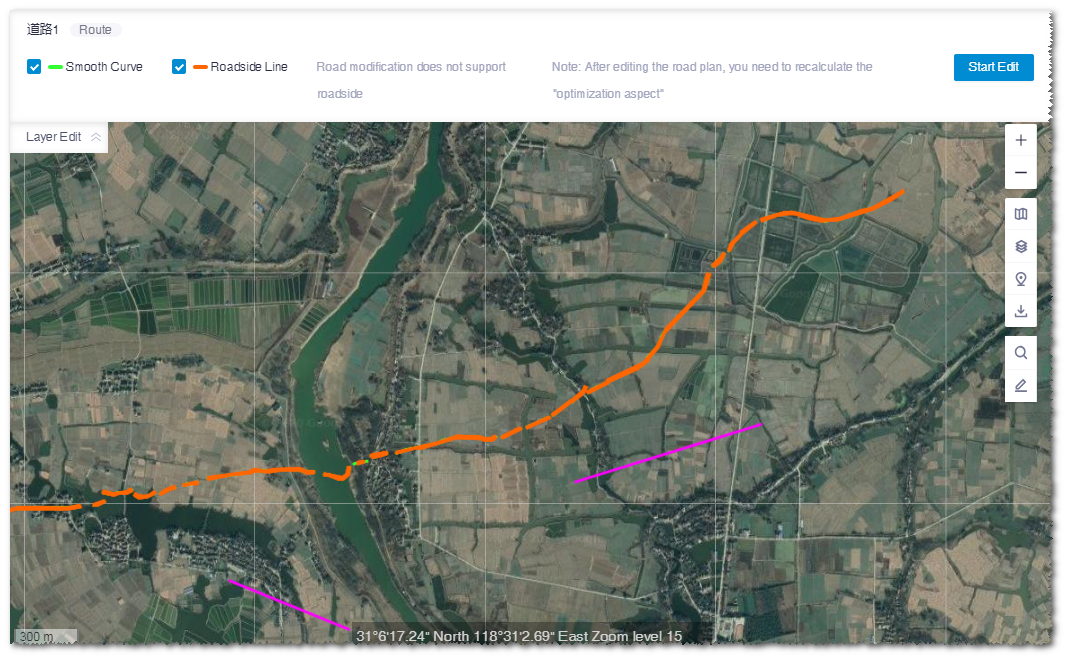
- Click the Start Edit button.
- Click the control nodes to delete them; drag the control nodes to add nodes and modify the route shape.
- After the modification is done, click the Save button to save the changes, or click Revocation to give up the settings.
-
Other than editing the existing route object, you can draw a route and
associate it to a route scheme.
- Draw a line in GIS. For details, refer to the section Drawing a Line.
-
Click the project name, and click the Save
button in the Layer Edit panel.
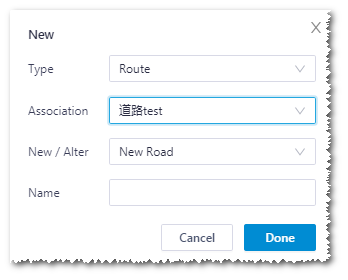
The New window pops up.
-
In the pop-up window, select Route as type,
select the creation type and associated scheme, and input the
name.
Note: If you select Entrance Road as road type, you need to select the surface type and width of original road.
- Click the Done button.