- Documentation
- Greenwich Fundamentals
- Navigation Menu
- Additional Function Menu
- Navigation Menu
Additional Function Menu
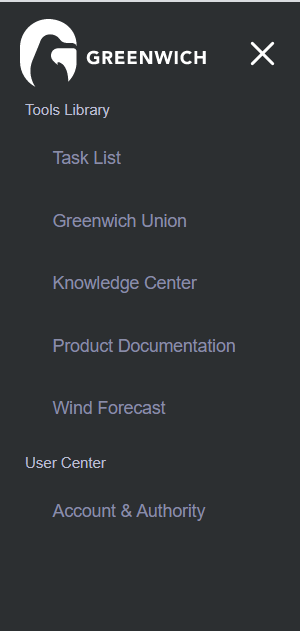
This menu is consisted of tools library and user center.
Tools Library
Tools library provides other related information of Greenwich, such as task list, Greenwich union, knowledge center, product documentation, and wind forecast.
Task List
This section shows the task status submitted from the Operation pane, such as CFD model, map merge, noise calculation, and EBA online matching.
The Task List interface is shown as follows:
Figure: Task List Interface Overview

| No. | Name | Description |
|---|---|---|
| ① | Time selection | Select the start and end date to show tasks submitted within this period. |
| ② | Task type | Select the task type, including Linear Model, CFD, CFDRans, AEP Calculate, Macro Planning,Macro Siting Pro, Map Matching, Noise Calculation, EBA Data Mapping, EBA Calculate, Mast Report, MicroSite Report, Wire Optimization, Tower Arrangement, Electric Check, Electric CAD, Substation Sitting, Turbine Foundation, Road Path Design, Road Quantities, Platform Design, CAD Map, Feasibility Report, Feasibility CAD, foundation CAD, Access plan, Economy map, RouteNet Calculate, Entrance route and platform design, and Calculation of entrance route and platform Engineering Quantity. |
| ③ | Check button | Click this button to show tasks with the specified type and within the specified period in the table ④. |
| ④ | Task list | Display basic information and status of calculation tasks. In the User, Project, Name, Status column, input specific values to search for relative tasks. Click the X symbol to delete the respective search value. |
Knowledge Center
Greenwich knowledge center provides all around information and guide on the Greenwich platform and a forum for user communication.
Click Knowledge Cente to open a tab in the internet browser showing the Greenwich knowledge center.
Knowledge consisted in this center are:
- Greenwich wiki: include the fundamental definitions, theories, and algorithms of Greenwich, wind power, and wind turbine.
- Operation: include tutorial videos and manuals on various modules.
- Forum: a platform for user communication and suggestion submission.
Product Documentation
This section provides the reference documentation for the Greenwich platform, including design guide, user manual, principle reference manual, and release note. Read these documents for better understanding of the Greenwich functions and values.

Wind Forecast
Wind forecast shows the forecast result from Global Forecast System (GFS) of National Oceanic and Atmospheric Administration (NOAA).
Click Wind Forecast to open a new tab in the internet browser. The interface is displayed as shown in the figure below:
Figure: Wind Forecast Interface Overview
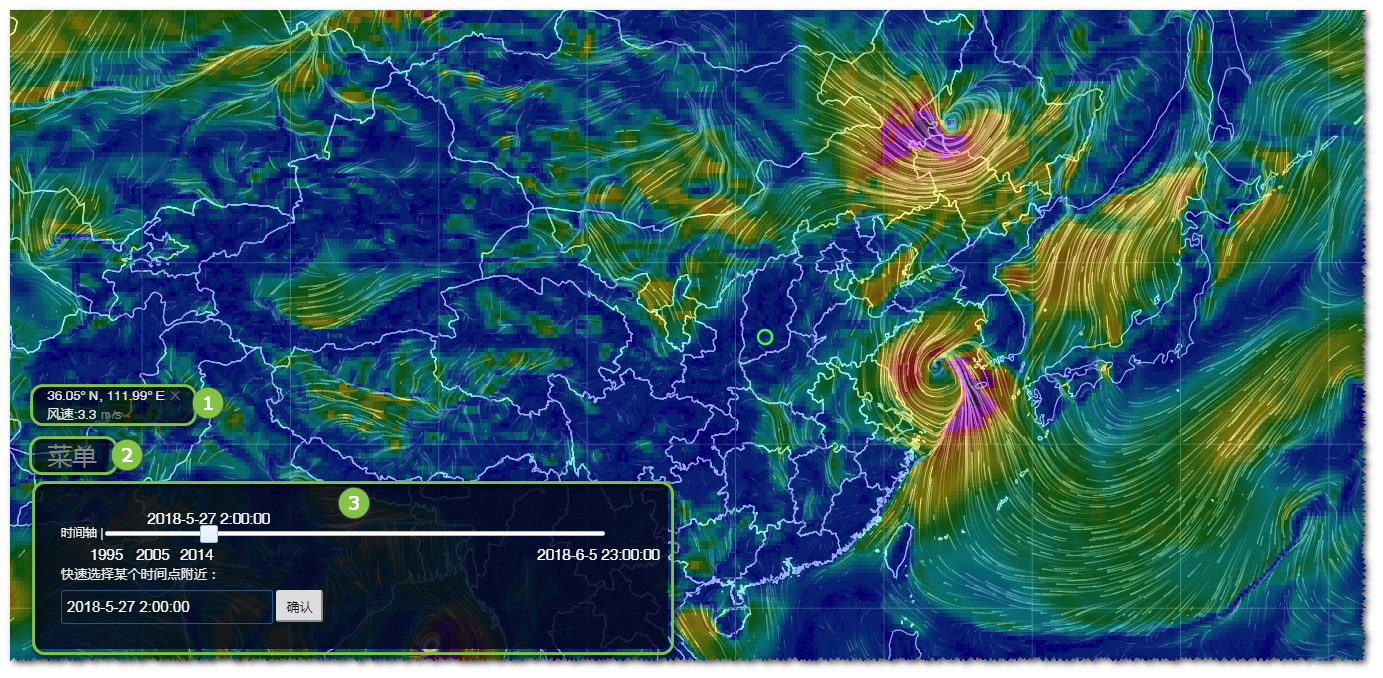
Table: Functional Areas on the Wind Forecast Interface
| No. | Name | Description |
|---|---|---|
| ① | Wind speed | Click on the map. The coordinate and wind speed of the point is shown. |
| ② | Collapse/expand the menu | Click Menu to collapse or expand the time selection area. |
| ③ | Time selection | Select the time of wind speed display. The default date is ten days after the current date. Drag the slider on the time axis to select the time of wind forecast. |
User Center
This function is for account and authority management helping you maintain the permissions of domains, projects, and users. You are enabled to share a project to someone for cooperation on it. Also, you can change the password and modify the user contact information.
Choose User Center > Account & Authority in the additional function menu to open the account management interface.
Figure: Account & Authority Interface Overview

| No. | Name | Description |
|---|---|---|
| ① | Home | Go back to the home page. |
| ② | Domain | Open the domain management view. |
| ③ | Project tree | List the domains and projects. Click the domain or project name. The corresponding authority and account details are shown in the operation area ⑤. |
| ④ | Authority management classification | Authority management is divided into three categories: domain, project, and user. Click the specific tab to shown the corresponding operation options. |
| ⑤ | Authority management operation area | Display the operation options for the specific object. You can manage the permissions and authority in this area. |
Domain Management
Domain management tab shows the domain authority details within the system.
Click a domain name in the project tree. The related information of this domain and its sub-domain is displayed in the operation area.

To edit the domain authorities, perform the following steps:
Click the edit icon
 to edit the existing domain name.
Click the Add button to create a new domain.
Click the User Management icon
 to assign operators and users for this domain.
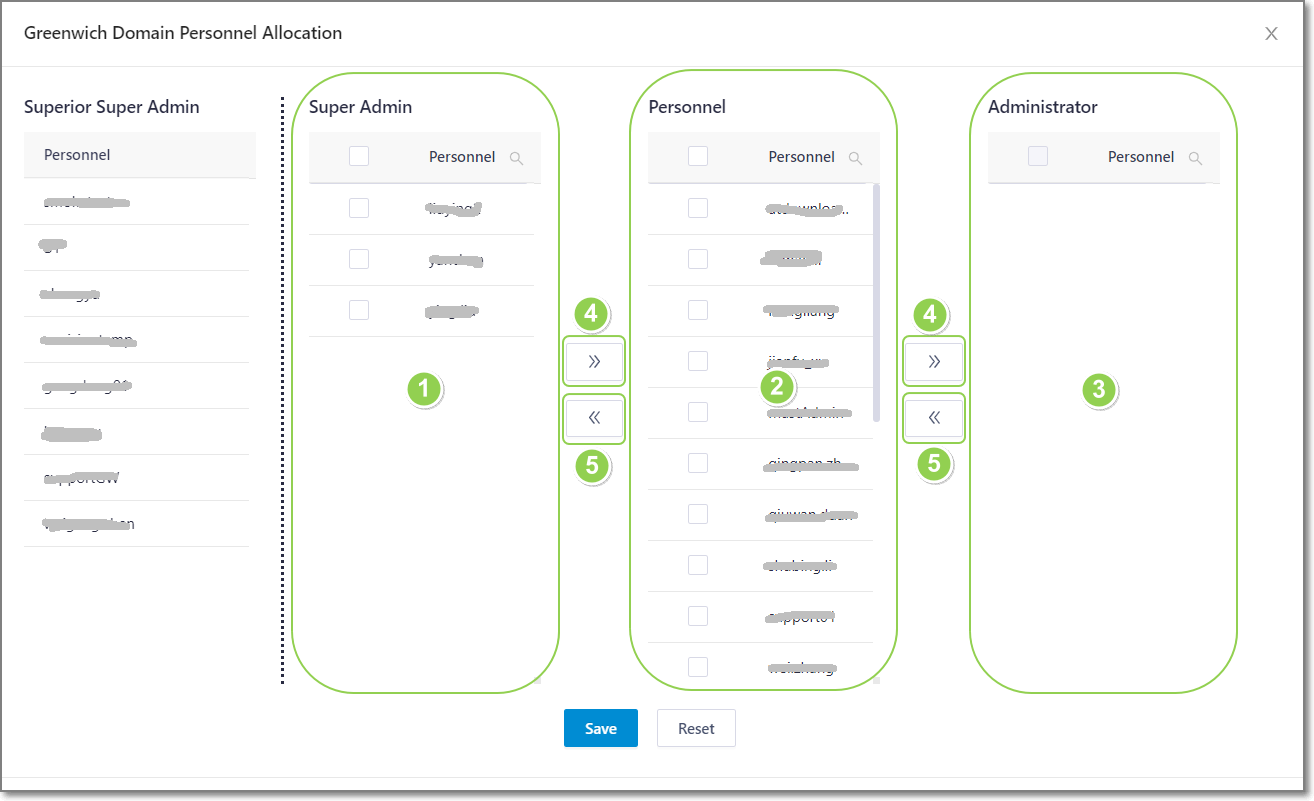
a.Click in the check box(es) in the Users list ② to select user(s). All the users authorized in this domain are listed in the Users list ②.
b.Click the add button ④ to add the selected user(s) into the Super Admin ① or Administrator ③ list. Super admin is the user empowered with authority of the selected domain and all sub-domains under it. Administrator is the user empowered with authority of the selected domain.
c.Click a user in the Super Admin ① or Administrator ③ list, and click the remove button ⑤ to delete it from the corresponding list.
Project Management
In the project management tab, you can see all the projects under domain, and their status, operators and users. You are enabled to assign operators and users for projects.
The project management area displays the authority information of all projects under the selected domain and its sub-domain.

To define the project authorities, perform the following steps:
In the Project drop-down menu, select All to display authority information of all projects.
Click the Release button to force unlock the project even if you are not the locker.
Click the Add button to create a new project.
Click the edit icon
 to modify the project name.
Click the delete icon
 to delete the project of the selected row.
Click the modify attribute domain icon
 to attribute the project to other domain.
Click the User Management icon
 to assign operators and users for this project.
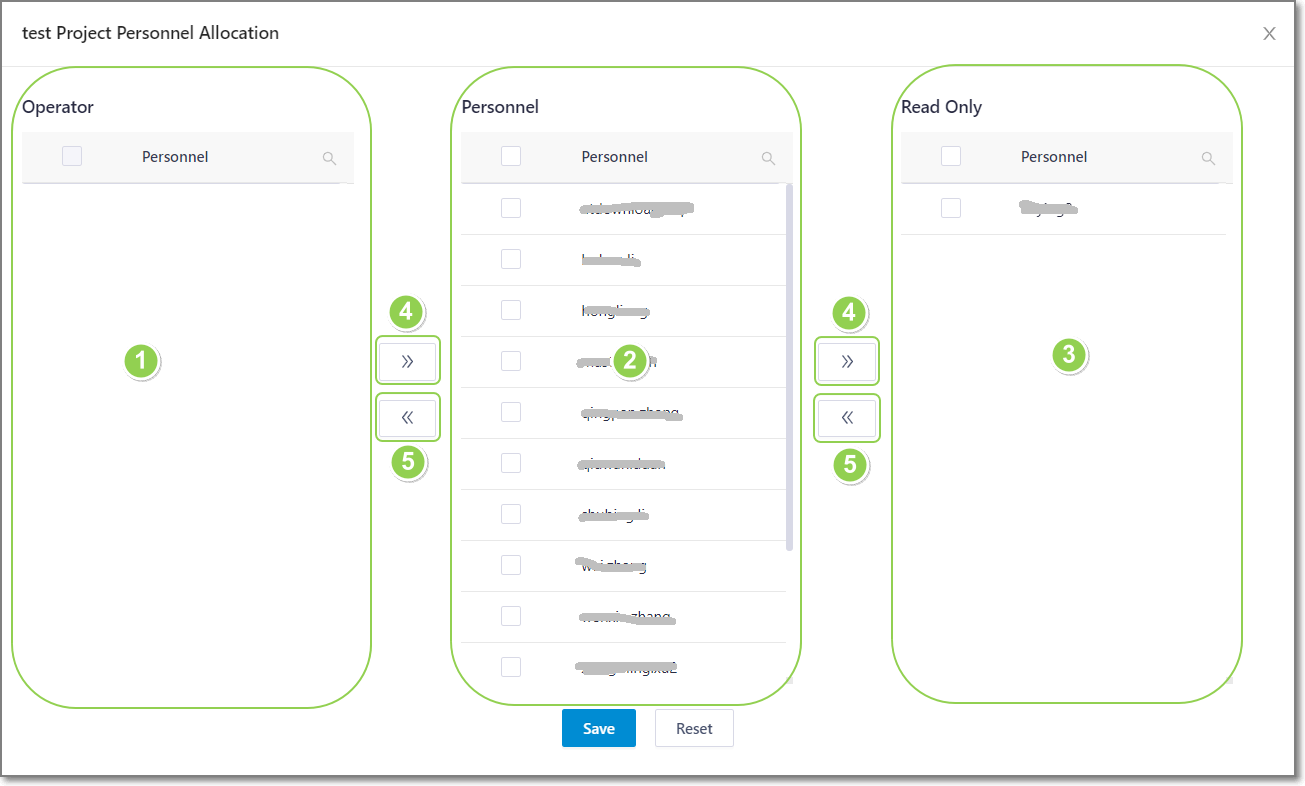
a.Click in the check box(es) in the Users list ② to select user(s). All the users authorized in this project are listed in the Users list ②.
b.Click the add button ④ to add the selected user(s) into the Operator ① or Reader ③ list. Operator is the user empowered with authority of locking and editing the selected project. Reader is the user who can see the project but not permitted to edit it.
c.Click a user in the Operator ① or Reader ③ list, and click the remove button ⑤ to delete it from the corresponding list.
User Management
In the user management tab, you are enabled to maintain user information, set up authority and modify password of a specific user.
The interface of user management is shown as in the following figure:

In the User drop-down menu, select All or 1st level user.
Click the Add button to create a new user.
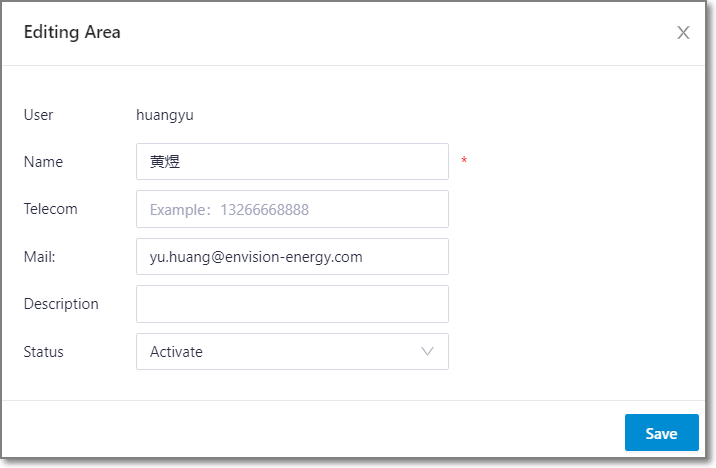
Click the edit icon
 to modify the user profile, including contact information, note, account status, and so on.
Click the edit password icon
 to modify the account password.
