Macrositing
Macrositing is the siting of wind farm, turbine, and mast in a specified region.
Before this task, click the map layers to check the wind speed, terrain, environmental data, reference wind farm, etc. to circle a approximate region for wind farm siting.
Select a Region for Development
For macrositing, the first step is to circle a region for successive operation.
- Click the resource detail icon
 in the toolbar menu. The Resource detail pane opens at the right side of the interface.
 - Click in GIS. The resource detail of this point is displayed in the pane. Switch between different elements to view the details. Refer to the section Address Detail for details.
- When you find a point you are interested in, click the Draw & measure
 icon to draw a polygon as the wind farm boundary. Refer to the section Drawing a Polygon to learn more about drawing polygon.
Developing Wind Farm Layout
In this section, you are introduced about how to set up siting parameters, start calculation, and check result.
Select the newly-created wind farm boundary and click the expand icon 《 to open the operation pane.
Click the Macro Siting tab in the Operation pane.
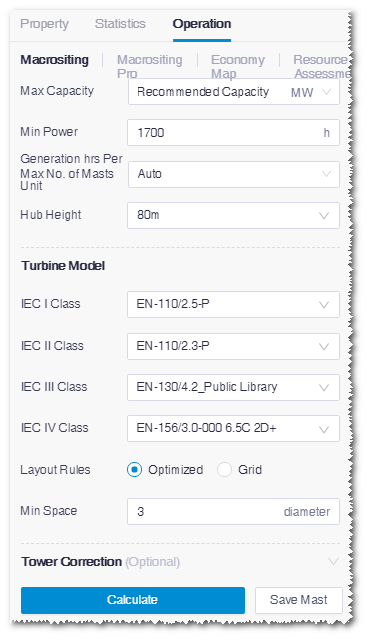
Figure: Macrositing Interface

Set up the following parameters.
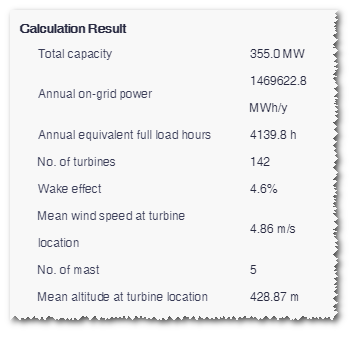
Macrositing Parameters¶ Name Description Max total Maximum capacity of a wind farm Min full-load hours per WTG Minimum full-load hours for a turbine Max No. of masts Maximum No. of recommended masts Hub height Hub height Turbine model Show the turbine model series in the project which contain common turbine model(s). If the selected turbine model series does not contain a turbine model at the selected hub height, the common turbine model at the nearest hub height will be adopted in the calculation. Layout rules Energy-optimized: layout by scatter; Grid: layout by queue Min distance Minimum distance between two turbines Click Calculate. The calculation progress is displayed at the center of GIS. When the calculation is completed, check the following parameters at the bottom of operation pane: total capacity, net AEP (after wake loss), full-load hours, total No. of WTG, wake loss, WTGs mean wind speed, No. of mast, WTG’s mean elevation.
Figure: Macrositing Result

Checking Macrositing Result
When macrositing is completed, check the generated folder named as <wind farm boundary name>-MacroSiting in the project pane. Three sub-folders are included:
- <wind farm boundary name>-WindFarmLayout: The layout of turbines
- <wind farm boundary name>-WindFarmLayout-ResourceGrid1_<hub height>: Wind resource grid in the resolution of 100m
- <wind farm boundary name>-WindFarmLayout-Map: Topography map of the wind farm Click the check box before one or some of the sub-folders. The turbine layout, wind resource grid, or map is displayed in GIS.
Click the check box before the layout sub-folder. The recommended turbine locations are displayed in GIS. The water-drop-shape icons with a blue round in the center represent recommended mast locations. Click one of these icons, the recommended mast height is shown, and the turbines around it are highlighted as orange, which means the clicked mast is able to cover the highlighted turbines.
Figure: Turbine Layout

The red water-drop-shape icons represent recommended turbine locations and the numbers on them indicate turbine types. Click a mast or turbine location and click the Switch to mast button
 in the operation button area. This point is transformed to a turbine or mast location respectively.
Note
In AEP calculation, the masts recommended in macrositing are taken as turbines.
Export the layout information.
- Double-click the layout result sub-folder. The turbine layout overview page opens.
- Select parameters in the Column Settings pane at the right side.
- Click the Export Table button to export the layout information into an Excel table in the default download directory of your browser.
Selecting Mast Locations
Among the recommended turbine locations, you can select some of them as masts and save them.
Click Save mast in the operation pane. The locations marked as masts are saved as Self-built mast 1/2/3/… in the macrositing folder.
Click one of the masts and open the Property pane.
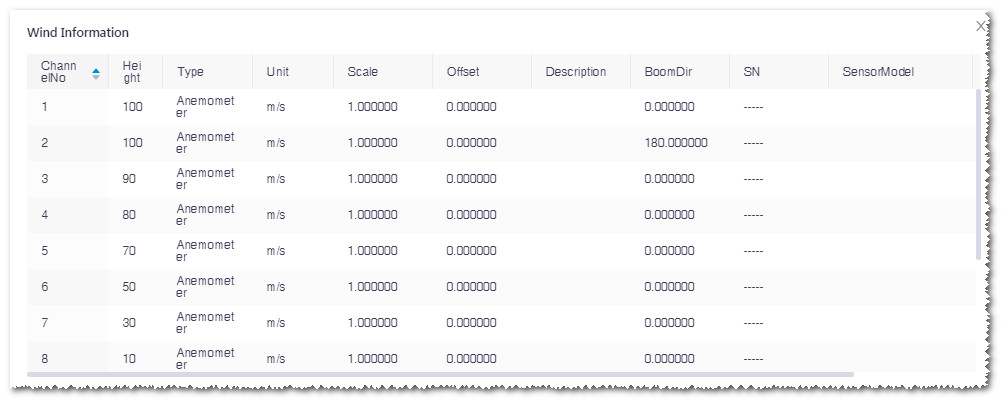
Click the Check Channel Info button to check the recommended mast configurations.
